If you searched for how to weld copper pipe plumbing, you are not alone – but you may be surprised to learn that welding is rarely the right answer for residential plumbing work. Most copper pipe connections in homes and commercial buildings are made using a process called soldering, also known as sweating. This guide clears up the confusion, walks you through every step of the process, and covers the real-world challenges that most tutorials skip entirely.
Welding vs. Soldering Copper Pipe – What’s the Difference and Which Do You Actually Need?
Before picking up any tools, it is worth understanding why the terms welding, brazing, and soldering are so often confused and what each one actually means in a plumbing context. Choosing the wrong method can result in failed joints, code violations, or damage to your pipe system.
Why “Welding” Copper Pipe Is a Common Misnomer
The term welding gets used loosely in everyday conversation, often as a catch-all for any process that joins two pieces of metal together using heat. In reality, true welding involves melting the base metals themselves and fusing them together, sometimes with a filler metal added. Copper is a relatively soft, heat-conductive metal, and melting it directly during a plumbing repair would be destructive and impractical. When most people say they want to weld copper pipe, what they actually mean is they want to permanently join two copper sections together and the correct technique for that is soldering.
Soldering (Sweating) vs. Brazing vs. Welding – A Quick Comparison
Here is how the three methods differ:
| Method | Base Metal Melted? | Heat Required | Common Use |
| Soldering | No | Low (propane torch) | Residential plumbing |
| Brazing | No | High (MAPP/oxy-acetylene) | HVAC, refrigeration |
| Welding | Yes | Very high (arc/TIG) | Industrial metalwork |
When Each Method Is Appropriate for Plumbing Projects
Soldering is appropriate for the vast majority of residential copper pipe work, including water supply lines, drain connections, and fixture installations. Brazing is used when a stronger, higher-temperature joint is needed, most commonly in HVAC refrigerant lines where operating pressures are much higher than in standard water systems. True welding of copper is essentially never used in residential plumbing. It requires specialized equipment, produces excessive heat that can warp or damage the pipe, and is unnecessary given how reliably soldered joints perform when done correctly.
Why Soldering Is the Standard for Residential Copper Pipe
Soldering has been the industry standard for copper plumbing for decades because it strikes the ideal balance of strength, reliability, cost, and accessibility. The tools are affordable, the learning curve is manageable, and a properly soldered joint will outlast the plumbing system itself. Soldered connections are also compact enough to fit inside wall cavities and tight spaces where bulkier mechanical fittings would be impractical. For anyone tackling a home plumbing project, soldering is a skill worth learning.
Tools and Materials You’ll Need

Having the right tools on hand before you start is one of the most important things you can do to set yourself up for success. Trying to improvise with the wrong equipment is one of the most common causes of failed joints and frustrating rework.
Cutting and Prep Tools (Tubing Cutter, Deburring/Reaming Tool)
A tubing cutter is the only correct tool for cutting copper pipe. Hacksaws and angle grinders leave rough, uneven edges that make a clean solder joint nearly impossible. Tubing cutters come in a range of sizes a standard cutter handles most household pipe sizes, while a close-quarters cutter is invaluable when working in tight spaces near walls or inside cabinets. After every cut, you will also need a deburring or reaming tool to remove the small internal lip left behind by the cutting wheel. Many tubing cutters include a fold-out reamer for this purpose.
Cleaning Supplies (Emery Cloth, Sand Cloth, Wire Brushes, Fitting Brushes)
Copper oxidizes quickly and the oxide layer on the pipe surface will prevent solder from bonding properly. You will need emery cloth or sand cloth to clean the outside of the pipe, and a fitting brush sized to match your pipe diameter to clean the inside of each fitting. Wire brush tools are also available that wrap around the pipe exterior for faster cleaning. Whichever method you choose, the goal is the same: bright, shiny copper on every surface that will be part of the joint.
Flux, Solder, and Torch Selection
For most residential projects, a standard propane torch is sufficient. MAPP gas torches burn hotter and are useful for larger pipe diameters or when you need to work faster. Your torch tip size should match the pipe you are working on a small tip for pipes one inch and under, and a medium or large tip for anything bigger. For solder, choose a lead-free option for any connection in a potable water system. For flux, an acid brush is used for application and you will choose between water-soluble or tinning flux depending on your experience level and pipe size.
Safety Gear (Gloves, Goggles, Flame Protector, Fire Extinguisher)
Never skip safety gear when working with an open flame. Heat-resistant gloves protect your hands from molten solder drips and hot pipes. Safety goggles guard against flux splatter. A flame protector shield, placed between the joint and any nearby wood or insulation, is essential when working inside walls or confined spaces. Always have a fire extinguisher within reach, and a spray bottle of water nearby to dampen surrounding materials before lighting the torch.
Choosing the Right Solder and Flux for Your Project
Not all solder and flux are interchangeable. Using the wrong type for your application can result in code violations, joint failure, or contamination of your water supply. Understanding what each product does and when to use it is fundamental to doing the job right.
Lead-Free vs. Leaded Solder – Code Requirements and Potable Water Rules
Lead-free solder is legally required for any pipe that carries drinking water in most jurisdictions across the United States and many other countries. Lead was the traditional solder material for decades, but its harmful effects on water quality led to widespread regulatory bans. Common lead-free alloys combine tin with small amounts of silver or antimony to achieve good flow and joint strength. Leaded solder may still be permitted for non-potable applications such as some HVAC systems, but you should always confirm with your local building code before using it.
Water-Soluble Flux vs. Tinning Flux – Which to Use and When
Water-soluble flux is easy to clean after soldering, leaves minimal residue, and is well-suited to potable water systems. It is the preferred choice for experienced solderers who have good heat control. Tinning flux contains fine powdered solder within the paste itself, giving it a forgiving quality that helps compensate for minor imperfections in surface prep or heat application. It is an excellent choice for beginners, for larger pipe diameters, and for tricky joints where you need a little extra help achieving a complete fill. Even seasoned plumbers often prefer tinning flux for demanding jobs.
Torch Types and Tip Sizing by Pipe Diameter
Propane is the go-to fuel for residential soldering. It is widely available, affordable, and produces enough heat for pipes up to about one inch in diameter. MAPP gas burns significantly hotter and is the better choice for pipes larger than one inch, or when you need to work quickly across multiple joints. Torch tip size matters as much as fuel type. Using an oversized tip on a small pipe concentrates too much heat too quickly, burning off the flux before the solder can flow. A correctly sized tip delivers even, controllable heat around the full circumference of the fitting.
Application-Specific Solder (HVAC, Electrical, Galvanized Metal)
Different applications call for different solder formulations. For HVAC refrigerant lines, brazing rods rather than soft solder are typically required due to the higher operating pressures involved. For electrical work on copper wiring or components, rosin core solder is the appropriate choice it contains its own flux and is formulated for low-resistance electrical connections. For galvanized metal repairs, acid core solder is used. Never substitute one type for another, as each is chemically optimized for its intended application.
How to Prepare Copper Pipe for Soldering
Preparation is not a preliminary step you can rush through to get to the interesting part. It is the foundation of every good solder joint. The most common cause of leaking or failed copper pipe connections is inadequate surface prep, not poor soldering technique. Take your time here and every subsequent step becomes easier.
How to Cut Copper Pipe Cleanly Without Crushing or Flaring
Place the tubing cutter around the pipe and align the cutting wheel precisely with your measurement mark. Hand-tighten the cutter just until the wheel makes contact with the pipe surface, then give it one additional quarter turn. Rotate the cutter around the pipe for one or two full passes, then tighten another quarter turn. Repeat this cycle — rotate, tighten, rotate until the cutter penetrates through the pipe wall. The key is patience: tightening too aggressively at the start crushes the pipe out of round, which makes it impossible to insert into a fitting properly.
Deburring the Interior – Why It Matters for Long-Term Flow
Every tubing cutter leaves a small inward-facing lip of displaced metal at the cut end of the pipe. If this burr is left in place, it creates a turbulence point inside the pipe where debris, scale, and sediment can accumulate over time. In the worst cases, this buildup can eventually restrict flow or create conditions that accelerate pipe corrosion. Deburring takes less than ten seconds using the fold-out reamer on your tubing cutter or a dedicated reaming tool. Use light, even pressure and rotate the tool until the interior edge is smooth.
Cleaning the Pipe Exterior and Fitting Interior

Even brand-new copper pipe has an oxide layer on its surface that will prevent solder from adhering. Use emery cloth or sand cloth to polish the outside of the pipe end until it is bright and shiny, typically covering the last inch or so that will be inside the fitting. For the fitting interior, use a wire fitting brush sized to match the fitting diameter. Work both surfaces until they gleam. Once cleaned, avoid touching either surface with your bare hands. Skin oils transfer easily to metal and create invisible barriers that disrupt solder flow just as oxidation does.
Applying Flux Correctly – How Much Is Enough
Use an acid brush to apply a thin, even coat of flux to both the outside of the pipe end and the inside of the fitting socket. The goal is full coverage without excess — you should not see flux pooling or dripping. Too little flux leaves areas unbonded; too much creates messy solder runs, promotes corrosion if not cleaned off afterward, and wastes material. Once flux is applied to both surfaces, slide the pipe fully into the fitting with a slight twisting motion to distribute the flux evenly across the contact surfaces. The joint is now ready to heat.
Step-by-Step: How to Solder (Sweat) Copper Pipe
With your pipe cut, deburred, cleaned, and fluxed, you are ready to solder. This is where preparation pays off. A properly prepped joint almost solders itself, the solder flows where it needs to go and the result looks professional even on your first attempt.
Assembling the Joint Before Heating
Once you have applied flux and inserted the pipe into the fitting, make sure the pipe is fully seated; it should be pushed all the way in until it contacts the internal stop inside the fitting. Check alignment carefully at this stage, because once you apply heat and the solder flows, repositioning is not an option without disassembling and starting fresh. If you are working on a multi-joint assembly, position all pieces correctly before touching the torch to anything.
Torch Angle, Flame Placement, and Even Heat Distribution
Hold the torch at approximately 45 degrees and direct the flame at the body of the fitting, not at the pipe itself. The fitting has more mass than the pipe wall and needs more heat to reach soldering temperature. Start at the base of the fitting and work the flame around its full circumference to heat the joint evenly. For larger fittings, apply heat from both sides. Uneven heating causes solder to flow toward only the hot side of the joint, leaving gaps on the cooler side. Even heat is what ensures the solder gets drawn fully around the entire joint.
How to Apply Solder and Recognize a Complete Joint
While heating, periodically pull back the flame and touch the tip of your solder wire to the joint on the opposite side from the flame. If the solder melts instantly on contact without needing the torch directly on it, the joint has reached the right temperature. Apply solder steadily, allowing capillary action to pull it into the gap between the pipe and fitting. A practical guide for quantity: use a length of solder equal to the pipe diameter half an inch of solder for a half-inch pipe, three-quarters of an inch for three-quarter pipe. A complete joint will show a thin, continuous silver band all the way around the fitting socket.
Wiping, Cooling, and Cleaning Up Flux Residue
Immediately after soldering, while the joint is still hot but no longer molten, use a damp rag to wipe away excess flux and any solder drips. This step is more than cosmetic residual flux is mildly acidic and will corrode copper over time if left in place, eventually causing the greenish patina you see on old plumbing. Follow the damp wipe with a dry cloth to remove any remaining traces. Allow the joint to cool naturally. Do not quench it with cold water immediately, as the sudden thermal shock can stress the joint. Wait several seconds before any water contact.
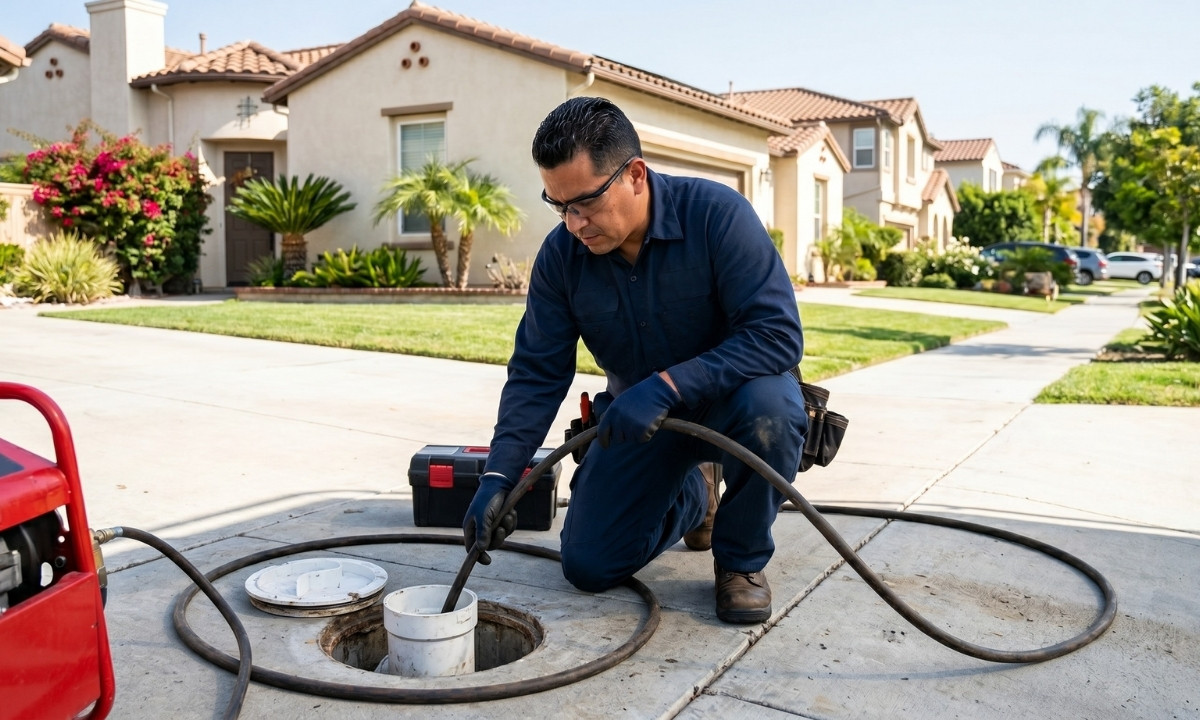
Working on Existing Plumbing – Real-World Challenges
Soldering a new pipe in an open workshop is straightforward. Soldering into an existing plumbing system is a different matter entirely. Most tutorials cover the clean, controlled scenario. This section covers what actually happens in the field.
How to Drain Water and Deal With Moisture Inside Live Pipes
The single most frustrating obstacle when soldering into an existing system is residual moisture inside the pipe. Even a small amount of water remaining in the pipe will turn to steam when heated, pushing back against the solder and preventing it from flowing into the joint. Before cutting into any existing pipe, shut off the water supply and open a faucet at the lowest point in the affected line to drain it completely. For stubborn moisture that will not drain by gravity, stuff a small piece of white bread into the pipe opening it absorbs residual water and disintegrates harmlessly once water flow is restored.
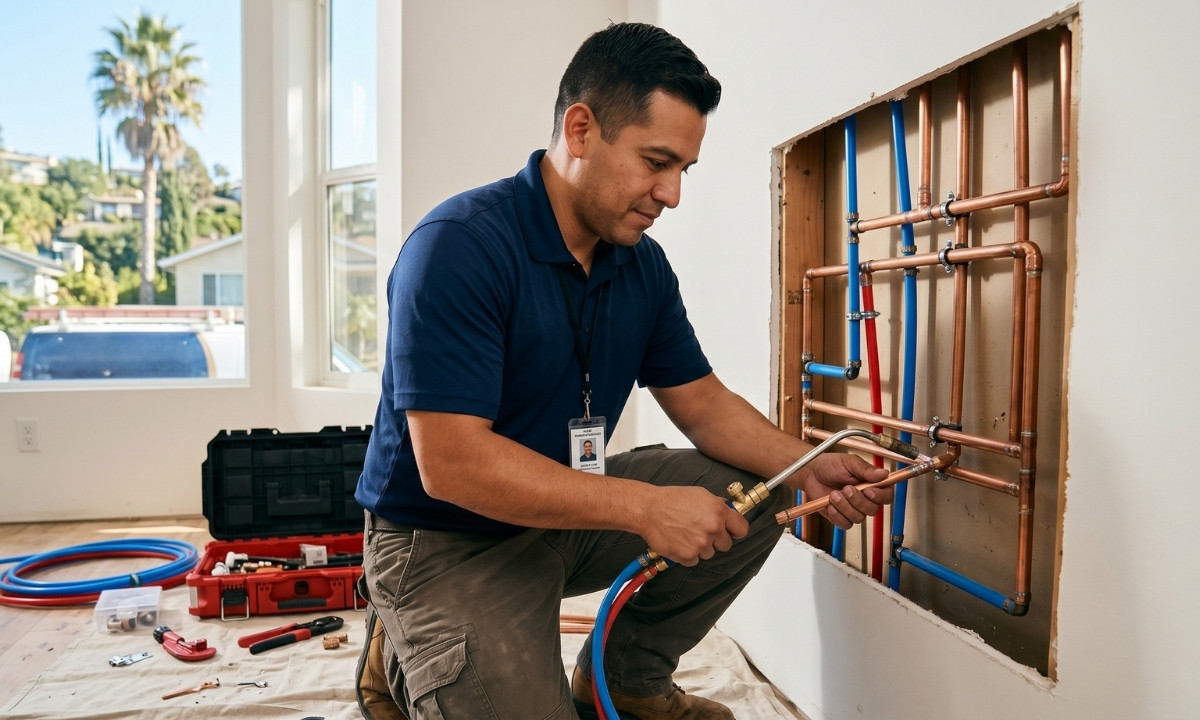
Soldering in Tight Spaces, Wall Cavities, and Overhead
When working inside a wall cavity or near wood framing, a flame protector is not optional it is essential. Position the shield so it sits between the joint and any combustible surface before you light the torch. Wet the surrounding wood or insulation lightly with a spray bottle as an extra precaution. When soldering overhead, reposition the joint if at all possible so you are working from the side rather than directly below. Molten solder drips quickly and without warning. After finishing any work inside a wall, stay and watch for several minutes to check for smoldering.
Handling Multi-Joint Fittings (T-Fittings and Elbows) Without Disturbing Adjacent Joints
When soldering a T-fitting or any component with multiple joints, the heat applied to one joint will conduct through the fitting body and can soften the solder in an adjacent joint that was just completed. If that adjacent joint is oriented vertically, gravity may pull it apart before the solder re-solidifies. The solution is to plan your soldering sequence so that previously completed joints are oriented horizontally when you heat the next one. A horizontal joint will hold in place under gravity even if the solder softens briefly from conducted heat.
Re-Soldering a Failed or Leaking Joint
If a joint fails or leaks, do not attempt to add more solder on top of the existing joint it rarely works and usually makes the problem worse. Instead, heat the joint until the solder liquefies and pull the pipe and fitting apart using pliers. The old solder will have filled the gap between the two surfaces, making it impossible to reassemble without removing it first. Use emery cloth to sand the pipe exterior and fitting interior until the old solder is removed and fresh copper is exposed. Re-apply flux, reassemble, and solder from scratch following the full process.
Safety, Testing, and Quality Control
A completed solder joint is not finished until it has been tested. And the entire soldering process is only as safe as the habits you bring to it. This section covers both dimensions of finishing a job properly.
Fire Safety Essentials When Using an Open Flame Indoors
Before lighting your torch, spend 20 seconds scanning your work area. Identify every combustible material within reach of your flame: wood framing, paper-backed insulation, plastic fittings, and stored materials on nearby shelves are all potential ignition points. Use a flame protector for every joint inside a wall or near framing. Keep a fire extinguisher and a water spray bottle within arm’s reach. After finishing your work, stay in the area and watch for at least five minutes. Heat conducts through metal and radiates into surrounding materials, and smoldering can begin several minutes after you have moved on.
How to Test Joints for Leaks (DIY Visual vs. Air Pressurization)
For straightforward DIY repairs, let the joint cool completely, then slowly restore water pressure and inspect the joint visually for drips or weeping. For professional installations or systems with multiple new joints, consider pressurizing the line with compressed air before introducing water. Air testing reveals leaks before water flows through the system, which means you can reheat and fix a bad joint without dealing with water contamination or wet walls. Dry joints can usually be repaired by reheating and applying additional flux and solder. Once water has passed through a leaking joint, the repair becomes more involved.
Signs of a Good Joint vs. a Bad One
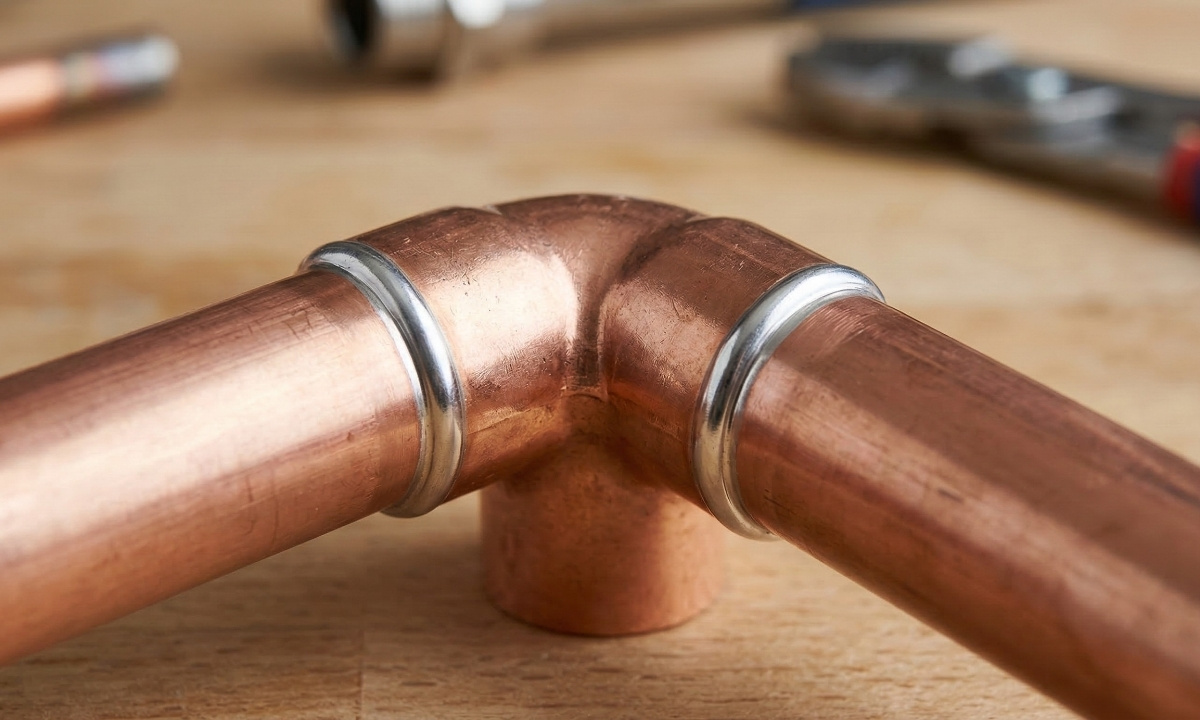
A correctly soldered joint will show a clean, continuous silver band running all the way around the fitting socket with no gaps or dark spots. The solder surface should appear smooth and slightly shiny. A bad joint often shows uneven solder distribution, dark burned patches where the flux was overheated, or solder that appears granular rather than smooth. A small drip on the underside of the joint is cosmetically imperfect but does not affect integrity. Gaps in the solder band indicate incomplete fill and the joint should be redone before pressure is applied.
Local Codes, Permits, and When to Call a Licensed Plumber
Many jurisdictions require a permit for plumbing work that goes beyond minor repairs, particularly when it involves new pipe runs, water heater replacements, or work inside walls. Unpermitted plumbing work can create complications when you sell a home and may leave you liable if a failure causes water damage. Lead-free solder is mandated by code for potable water systems in most of the United States under federal law and local amendments. If you are unsure whether your project requires a permit, contact your local building department before starting. If the scope of work involves main supply lines or anything near the meter, hire a licensed plumber.
Common Mistakes and How to Avoid Them
Even experienced DIYers make mistakes on copper pipes. The good news is that most of them are predictable and avoidable. Understanding what goes wrong and why is the fastest way to develop reliable technique.
Skipping Surface Prep or Contaminating Cleaned Surfaces
This is the number one cause of failed joints among beginners. Solder will not bond to oxidized copper or to surfaces contaminated with skin oil, grease, or construction dust. Clean every surface that will be part of the joint, even if the pipe looks clean to the naked eye. After cleaning, handle the prepared surfaces only with gloves or avoid touching them altogether. Laying a cleaned pipe section down on a dirty workbench can recontaminate it before you even apply flux. Keep cleaned components elevated or on a clean surface until you are ready to assemble.
Overheating, Under-Heating, and Wrong Torch Tip Size
Overheating is more common than under-heating among beginners who assume more heat is always better. Excess heat burns the flux off the joint surface before the solder arrives, leaving nothing to facilitate bonding. You will see the flux smoke and turn black when this happens a clear sign to back off and let the joint cool before starting over. Under-heating leaves the joint too cool for the solder to flow into the gap, resulting in solder that sits on the surface rather than wicking inside. An oversized torch tip on a small pipe causes both problems simultaneously.
Applying Too Much or Too Little Flux and Solder
More is not better with either flux or solder. Excess flux creates messy, uneven solder runs, leaves more acidic residue to clean up, and can actually interfere with solder flow if it pools inside the fitting. Excess solder drips onto surrounding surfaces, can flow into the pipe interior and restrict flow, and is a sign that joint preparation was inadequate. Use the diameter rule for solder quantity and apply flux as a thin, even coat. If your joint consistently requires excess solder to seal, the underlying issue is almost always incomplete cleaning or uneven heat.
Neglecting Cleanup and Post-Solder Inspection
The work is not done when the solder solidifies. Flux residue left on copper is acidic and will slowly eat into the pipe surface, causing premature corrosion and eventually leaks. Wipe down every joint while it is still warm using a damp rag, then follow with a dry cloth. Inspect the joint visually before moving on to the next one. Look for the continuous silver band that indicates complete fill. If you notice a gap or dark spot while the joint is still warm and dry, it is much easier to reheat and fix it now than after the system has been pressurized.
Frequently Asked Questions
Can you actually weld copper pipe instead of soldering it?
Technically, copper can be welded using TIG (tungsten inert gas) welding, but this is almost never done for plumbing purposes. TIG welding copper requires specialized equipment, significant skill, and produces a heat-affected zone that can alter the mechanical properties of the pipe. For residential and commercial plumbing, soldering is the established, code-compliant standard. If you need a stronger connection than soft soldering for high-pressure applications, brazing with a silver alloy rod is the appropriate upgrade, not welding.
What happens if you use the wrong solder on a drinking water pipe?
Using leaded solder on a potable water pipe can leach lead into your water supply over time, posing serious health risks particularly to children and pregnant women. Even small concentrations of lead in drinking water are considered unsafe. Beyond the health risk, using leaded solder on potable water lines violates building codes in most jurisdictions and would likely be flagged during a home inspection. If you are unsure whether existing plumbing in an older home contains leaded solder joints, consider having your water tested and consulting a licensed plumber.
How long should you heat a copper joint before applying solder?
There is no fixed time measurement the correct indicator is the behavior of the solder itself, not the clock. Begin touching the solder wire to the joint every few seconds while continuing to heat. When the joint has reached proper temperature, the solder will melt instantly on contact with the copper without needing the flame directly on it. This typically takes between 15 and 45 seconds depending on pipe diameter, torch tip size, and ambient temperature. Using the solder as your temperature gauge is more reliable than any time estimate.
How do you fix a copper pipe joint that keeps leaking?
A persistently leaking joint almost always indicates one of three underlying problems: incomplete surface preparation, residual moisture in the pipe, or uneven heat during soldering. Do not try to patch the joint by adding more solder over the top this approach rarely works. Shut off the water, drain the line completely, disassemble the joint by heating and separating the pipe and fitting, remove all old solder with emery cloth, and start the full process again from cleaning. Pay particular attention to drying out the pipe interior before attempting the repair.
Is soldering copper pipe a job for DIYers or should I hire a plumber?
Soldering copper pipe is a realistic DIY skill for anyone comfortable working with tools and following a careful process. Simple repairs, fixture installations, and adding a new branch to an existing line are all manageable for a prepared homeowner. Where the calculation changes is when the project involves main supply lines, water heaters, anything near the water meter, gas lines, or work that requires a permit. For those situations, the consequences of an error are significant enough that hiring a licensed plumber is the smarter investment.
Conclusion
Key Takeaways – The Right Method Makes All the Difference
If there is one central lesson to take from this guide, it is that the term welding copper pipe is almost always a misnomer. What you need to learn is soldering, and it is more accessible than most people assume. The process follows a clear, logical sequence: cut cleanly, deburr, clean thoroughly, apply flux correctly, heat evenly, solder with the right amount of the right material, wipe down, and test. Master that sequence and you will produce reliable, watertight joints that can last decades.
The areas where most beginners struggle are not the soldering itself but the preparation steps before the torch ever comes out. Clean copper, correct flux, and even heat are what separate a joint that holds from one that leaks. Spend the extra two minutes on prep every time and the soldering step will take care of itself.
Next Steps and Further Reading
Ready to put this into practice? Start by picking up a short length of copper pipe and a few fittings from your local hardware store and practice making joints on the workbench before tackling a live plumbing repair. The hands-on repetition of even two or three practice joints builds the tactile sense of correct temperature and solder flow that no article can fully convey.
For further reading, explore guides on choosing between copper, PEX, and CPVC pipe for different applications, how to rough-in plumbing for new construction, and the specific requirements for HVAC brazing if your projects take you beyond residential water supply work. If your project requires permits or involves any uncertainty about local code compliance, consult your local building department or a licensed master plumber before proceeding.
Have questions about your specific project or want to share how your first solder joint turned out? Leave a comment below we read and respond to every one.