Drip. Drip. Drip.
That sound isn’t just a nuisance-it’s a drain on your finances. A single faucet dripping once per second can waste over 3,000 gallons of water annually, according to the EPA Water Sense Program. That’s enough water to run more than 180 showers.
While DIY plumbing can feel intimidating, most leaky faucets require only basic tools and a few minutes of your time. This guide simplifies the repair process, helping you identify your faucet type, gather the right supplies, and stop the leak for good.
Why You Should Never Ignore a Dripping Faucet
Small leaks rarely stay small. Beyond the spike in your water bill, a leaky faucet causes silent, expensive damage to your home.
Constant moisture degrades the caulk and sealant surrounding your sink, allowing water to seep into the vanity. This often leads to hidden cabinet rot, ruined porcelain, and hazardous mold growth. Fixing the issue now prevents a $10 parts replacement from turning into a thousand-dollar renovation.
The Essential DIY Faucet Repair Toolkit
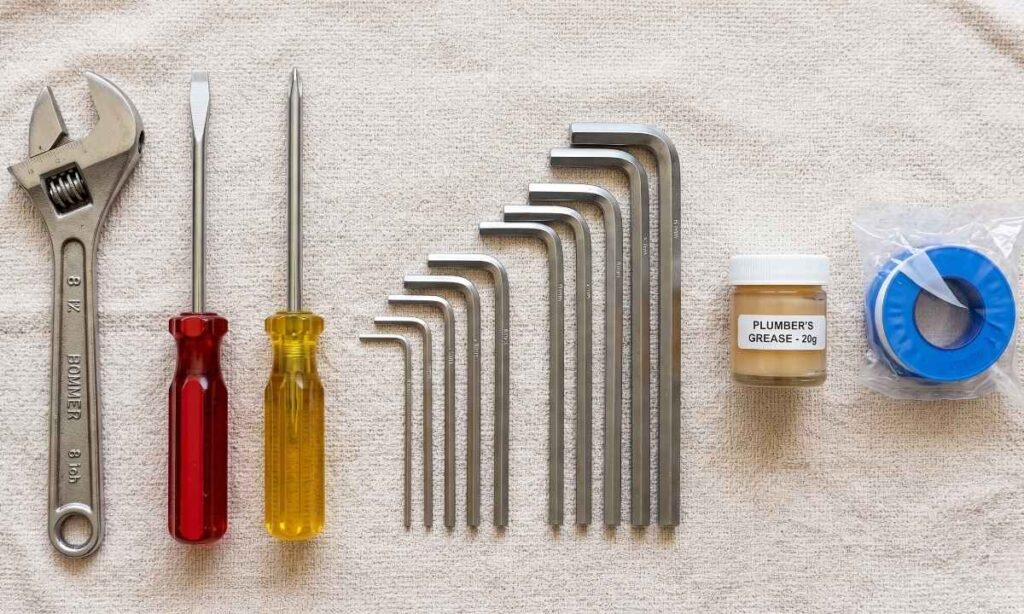
Prepare your workspace before you begin. Having these plumbing supplies ready ensures a smooth repair and prevents frustrating, mid-project trips to the hardware store.
- Adjustable Wrench: For loosening packing nuts and valves.
- Screwdrivers: Both Phillips and Flathead for handle removal.
- Allen Wrenches: To loosen hex-head screws on modern handles.
- Plumber’s Grease & Teflon Tape: For creating watertight seals.
- Catch Bucket & Rags: To manage residual water and protect the sink finish.
Identifying Your Faucet Type: The 4 Main Mechanisms
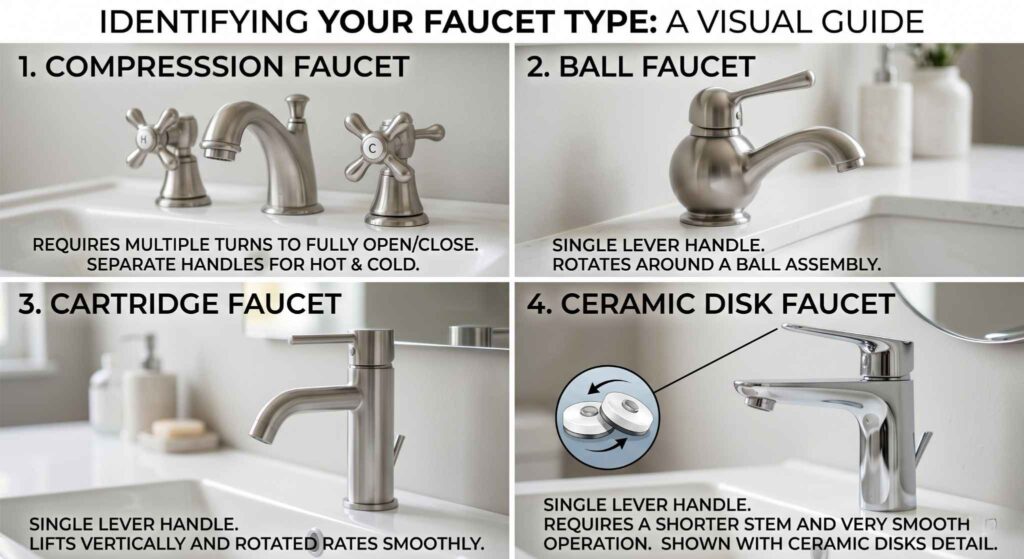
You cannot fix a dripping tap effectively until you understand its internal mechanism. Most homes feature one of these four common designs:
- Compression Faucets: Identified by two separate handles (Hot/Cold). They use rubber washers that compress to stop water flow.
- Ball Faucets: Common in kitchens; they feature a single handle that rotates over a dome-shaped cap.
- Cartridge Faucets: Available in single or double-handle versions. They use a replaceable plastic or brass “cartridge” to regulate flow.
- Ceramic Disk Faucets: The most modern and durable type. They use two sliding ceramic disks to control water.
Step-by-Step: How to Fix a Leaky Faucet Like a Professional
Keyword Focus: DIY faucet repair steps, replace faucet cartridge, fix a leaky sink
1. Shut Off the Water
Locate the shut-off valves under your sink and turn them clockwise until tight. Open the faucet to drain residual pressure and confirm the water is off.
2. Protect the Drain
Plug the sink or cover it with a rag. This prevents tiny screws or washers from falling down the drain-a mistake that can turn a quick fix into a nightmare.
3. Remove the Handle
Pry off the decorative cap (usually marked “H” or “C”) to reveal the handle screw. Unscrew it and pull the handle straight up to expose the internal assembly.
4. Remove and Inspect the Parts
Use your adjustable wrench to loosen the packing nut. Pull out the cartridge, stem, or ball assembly. Look for cracked O-rings, flattened washers, or mineral buildup.
5. Install New Parts
Take your old parts to the hardware store to ensure an exact match. Apply a thin layer of plumber’s grease to new O-rings for a better seal and smoother operation.
6. Reassemble and Test
Place the new components back into the faucet body in reverse order. Turn the water supply back on slowly and test the faucet.
Preventative Maintenance: Stop Leaks Before They Start
Extend the life of your plumbing fixtures with these simple habits:
- Clean Aerators Regularly: Soak the faucet tip in white vinegar every six months to dissolve mineral deposits.
- Avoid Over-tightening: Turning handles too hard crushes the internal washers, leading to premature leaks.
- Check Water Pressure: High home water pressure can damage fixtures. Use a gauge to ensure your pressure is between 40 and 60 PSI.
When Should You Call a Professional?
If your DIY attempt doesn’t stop the drip, or if you notice water pooling inside your cabinets, it’s time to call the experts. Corroded valves or cracked internal faucet bodies require professional intervention to avoid catastrophic water damage.
Don’t let a small leak become a big problem. Contact the experts at Jetterman Plumbing today for fast, reliable, and professional service.
Quick Summary Table for Readers
| Faucet Type | Most Common Cause of Leak | Difficulty Level |
| Compression | Worn-out rubber washer | Easy |
| Cartridge | Damaged O-ring or cartridge | Medium |
| Ball | Degraded inlet seals/springs | Medium |
| Ceramic Disk | Dirty or cracked disk cylinder | Hard |