Whether you’re building a new bathroom from scratch or renovating an existing one, plumbing a bathroom is one of the most technically demanding home projects you can take on. Done right, it provides decades of reliable performance. Done wrong, it can mean hidden water damage, sewer gas infiltration, code violations, and costly repairs down the road.
This guide covers everything you need to know about how to plumb a bathroom from planning and permits through rough-in, venting, and fixture installation. We’ll walk through each phase step by step, note important differences between the two major U.S. plumbing codes (the International Plumbing Code, or IPC, and the Uniform Plumbing Code, or UPC), and flag the most common mistakes so you can avoid them.
Let’s get started.
What You Need Before You Start (Codes, Permits, and Planning)
Before a single pipe is cut or a fitting is glued, there’s critical groundwork to lay. Bathroom plumbing connects directly to your home’s main water supply and sewer system, two systems that affect the health, safety, and structural integrity of your entire home. Skipping the planning phase is one of the most common and costly mistakes homeowners make.
The preparation phase covers four areas: understanding your local plumbing code, determining whether you need a permit, creating a compliant plumbing plan, and deciding whether to hire a licensed plumber or tackle the project yourself.
How to Check Your Local Plumbing Code (IPC vs. UPC Differences)
The United States is governed by two primary plumbing codes: the International Plumbing Code (IPC) and the Uniform Plumbing Code (UPC). Your jurisdiction will adopt one or the other sometimes with local amendments and the differences between them can directly affect which fittings you buy, how you size your vents, and how you make certain connections.
To find out which code applies to you, contact your local building department or check your city or county’s official website. In general, the IPC is more common in the eastern and central United States, while the UPC is predominant in the western states. Some jurisdictions use hybrid codes based on earlier editions of either standard.
Throughout this article, IPC and UPC differences are called out wherever they affect the work — including vent sizing, fitting quantities, and slope requirements.
Tip: When in doubt, always check with your local building department before purchasing materials. A single phone call can save you from buying the wrong fittings for your code.
Do You Need a Permit to Plumb a Bathroom?
In most jurisdictions, yes you will need a building permit to plumb a bathroom, particularly when the work involves connecting to the main drain, waste, and vent (DWV) system or the main water supply lines. Some areas also require the work to be performed by a licensed plumber, regardless of whether a permit is issued.
Permit requirements exist for good reason. Unpermitted plumbing work can create serious problems when you sell your home, make insurance claims, or need to refinance. If the work doesn’t pass inspection, you may be required to open walls and redo the installation at your own expense.
To apply for a permit, most jurisdictions require a submitted plan showing the location of all fixtures, pipe runs, and venting. Plans should be drawn to scale on grid paper and include pipe sizes and material types. If you’re uncomfortable producing these drawings yourself, many licensed plumbers will draw them for a flat fee.
How to Draw a Plumbing Plan That Passes Inspection
A good plumbing plan doesn’t need to be a work of art, but it does need to be accurate and complete. Include the following in your plan:
- The location of all fixtures (toilet, sink, tub/shower) with dimensions from walls
- All pipe runs, labeled with pipe size and material
- The location of the main stack and how drain lines connect to it
- All vent runs, including how they terminate at the roof
- Clearances between fixtures
- The location of any cleanouts
Draw the plan from two perspectives if possible: a floor plan (top-down view) and a riser diagram showing the vertical relationships between pipes. Many building departments provide example plans or templates on their websites. Some jurisdictions accept hand-drawn plans; others require CAD drawings for larger projects.
DIY vs. Hiring a Licensed Plumber What the Job Actually Requires
Plumbing a bathroom is a physically and technically demanding project. Before committing to a DIY approach, honestly assess whether you have the skills, tools, and time the job requires. Rough-in plumbing involves cutting through floor joists and wall studs, working in tight crawl spaces, soldering or crimping supply lines, and making precise drain slope calculations. Errors in any of these areas can cause leaks that hide inside walls for months before becoming visible.
That said, many capable homeowners do successfully plumb their own bathrooms — particularly when using modern materials like PEX tubing that don’t require soldering. The key is going in prepared.
A licensed plumber brings code knowledge, experience, tools, and liability coverage. If your project is part of a larger remodel, hiring a plumber for the rough-in while you handle finish work (like trim and fixture installation) can be an effective way to balance cost and risk.
Cost note: According to industry data, rough-in plumbing for a new bathroom averages around $6,500, while repiping an existing bathroom averages closer to $7,500. These are national averages and vary significantly by region, material choice, and project complexity.
How Much Does It Cost to Plumb a Bathroom?
Understanding the cost of bathroom plumbing helps you budget realistically whether you’re hiring out the entire project, doing part of it yourself, or comparing quotes from contractors. Costs break down differently depending on whether you’re plumbing a new bathroom or working with an existing space.
Average Cost for New Rough-In Plumbing
For a brand-new bathroom installation where no existing plumbing infrastructure is in place rough-in plumbing typically costs between $5,000 and $8,000, with a national average around $6,500. This covers running supply lines, installing drain and vent pipes, setting the toilet flange, and completing all the work that happens inside walls and floors before fixtures are installed.
Factors that affect this cost include the distance from the main stack, the number of fixtures, local labor rates, and the pipe materials used. A ground-floor bathroom addition adjacent to existing plumbing will cost significantly less than a second-floor addition that requires running new lines through finished walls.
Cost to Replumb or Repipe an Existing Bathroom
Replacing existing pipes in a functioning bathroom is generally more expensive than new rough-in work, primarily because of the demolition and restoration involved. Opening finished walls and floors, removing old pipe, and patching afterward adds significant labor time. National averages for repiping a bathroom run around $7,500, though projects involving galvanized steel or cast iron pipe replacement can run higher due to the difficulty of working with old materials.
If you’re dealing with aging galvanized supply lines or clay drain pipes, replumbing is often worth the investment; older materials degrade over time, leading to restricted flow, leaks, and water quality issues.
Where DIY Saves Money (and Where It Can Cost More)
The most significant DIY savings come from labor; a licensed plumber typically charges $45 to $200 per hour depending on region. If you’re doing a straightforward rough-in with PEX supply lines and PVC drain lines, eliminating 20 to 40 hours of plumber labor can save $1,000 to $5,000 or more.
However, DIY can cost more in several situations: if you buy the wrong materials due to misreading code requirements, if you make installation errors that require tearing out and redoing work, or if your project fails inspection and requires a licensed plumber to correct and reinspect. Factor these risks honestly into your decision before proceeding.
Bathroom Plumbing Materials, Fittings, and Tools
Using the right materials and fittings from the start is essential. Using the wrong fitting in the wrong location isn’t just a code violation; it can cause drain backups, sewer gas infiltration, or structural damage over time. This section covers everything you need to gather before starting work.
DWV Fittings You’ll Need (With IPC and UPC Quantities)

DWV stands for Drain, Waste, and Vent, the network of pipes that removes wastewater and controls air pressure in your drainage system. The exact fittings required depend on your code. The table below shows the fittings needed for a standard three-fixture bathroom (toilet, sink, tub/shower) under each code:
| DWV Fitting | Qty (IPC) | Qty (UPC) |
| 1.5″ Sanitary Tee | 2 | 1 |
| 2″x2″x1.5″ Sanitary Tee | 0 | 1 |
| 3″ Sanitary Tee | 1 | 1 |
| 1.5″ 90-degree elbow | 1 | 1 |
| 4″x3″ Closet Bend | 1 | 1 |
| 4″ Closet Flange | 1 | 1 |
| 3″x3″x1.5″ Wye (with 45) | 1 | 1 |
| 3″ Combo (Wye + 1/8 Bend) | 1 | 1 |
| 1.5″ P-Trap | 1 | 1 |
| 1.5″ Trap Adapter | 1 | 1 |
| 3″ Cleanout Adapter | 1 | 1 |
| 3″ Cleanout Plug | 1 | 1 |
| 3″x1.5″ Flush Bushing | 1 (IPC) | 0 |
| 3″x2″ Flush Bushing | 0 | 1 (UPC) |
Always buy a few extra fittings of each type of PVC cement bonds immediately and mistakes happen. Extra fittings on hand prevent costly trips to the hardware store mid-installation.
Supply Line Materials Compared: PEX, PVC, Copper, and Steel
Four materials are commonly used for water supply lines, each with its own trade-offs:
- PEX (Cross-linked polyethylene): Flexible, easy to install without soldering, freeze-resistant, and cost-effective. The best choice for most DIY installations. Requires a PEX crimping tool and cutter.
- Copper: Durable, long-lasting, and widely accepted by all codes. However, it requires soldering (sweating) joints, which takes skill and specialized tools. More expensive than PEX.
- CPVC (Chlorinated PVC): Rigid plastic that can be glued rather than soldered. Less common than PEX for new work but sometimes used in retrofit situations.
- Galvanized Steel: An older material that is rarely used in new construction. If you’re replacing existing galvanized lines, switch to PEX or copper galvanized steel corrodes over time and reduces water flow.
For most homeowners tackling a bathroom plumbing project for the first time, PEX is the recommended choice. It’s forgiving, widely available, and doesn’t require specialized heat tools.
Drain Line Materials and When to Use Each
PVC (polyvinyl chloride) is the standard material for residential drain lines in new construction. It’s lightweight, easy to cut, glues together with solvent cement, and is accepted by both the IPC and UPC. Use Schedule 40 PVC for drain and vent lines.
ABS (acrylonitrile butadiene styrene) is a black plastic pipe that was common in older construction and is still used in some western states. It cannot be directly glued to PVC if you’re extending existing ABS lines, use an approved transition cement and follow your code’s requirements for mixed-material connections.
Cast iron is found in older homes and is extremely durable but heavy and difficult to work with. If you’re tying into existing cast iron, use a fernco (no-hub) coupling to connect your new PVC to the existing pipe.
Full Tools Checklist Before You Begin
Gather these tools before starting work to avoid interruptions mid-project:
- Tape measure and pencil
- 4.5″ hole saw and cordless drill
- Reciprocating saw (for cutting joists or existing pipe)
- PVC pipe cutter or hacksaw
- PVC primer and solvent cement
- PEX crimping tool and cutter (if using PEX supply lines)
- Torpedo level
- Plumber’s wrench and channel-lock pliers
- Pipe strap and screws (for securing pipe to framing)
- Teflon tape (plumber’s tape)
- Safety glasses and work gloves
- Bucket and shop vac (for water cleanup)
Bathroom Plumbing Rough-In Dimensions

Getting rough-in dimensions right is the foundation of everything that follows. These measurements determine where your pipes terminate inside walls and floors, and they must align precisely with the fixtures you plan to install. Small errors at this stage compound into big problems when it’s time to set fixtures.
Always confirm rough-in dimensions against the specification sheet for your specific fixtures before finalizing pipe placement manufacturers vary, and standard dimensions are starting points, not guarantees.
Toilet Rough-In Measurements (Flange Placement, Clearances)
The toilet rough-in dimension refers to the distance from the finished wall behind the toilet to the center of the toilet’s drain (the closet flange). The standard measurement is 12 inches from the finished wall or 12.5 inches from unfinished wall studs (to account for drywall thickness). Some toilets use a 10-inch or 14-inch rough-in; always confirm before cutting.
From the side walls, the toilet flange should be centered in the available space with a minimum clearance of 15 inches from the centerline to any wall or obstruction on either side. The IPC and UPC both require a minimum of 21 inches of clear space in front of the toilet bowl.
Note: If you’re measuring from unfinished studs, add the thickness of your wall finish material (typically 0.5 inch for drywall) to all measurements before marking the subfloor.
Bathroom Sink Rough-In Dimensions (Drain Height, Supply Line Spacing)
The center of the bathroom sink drain stub-out should be located approximately 18 inches above the finished floor. This accommodates a standard 1.5-inch P-trap and trap arm beneath a typical vanity.
Hot and cold supply lines are roughed in 21 inches above the finished floor, centered on either side of the drain. Space them 8 inches apart 4 inches to the left and 4 inches to the right of the drain centerline. Hot is always on the left, cold on the right, when facing the sink.
If you’re installing a pedestal sink or a wall-hung sink without a vanity, confirm the manufacturer’s specified rough-in dimensions, as these can vary significantly from vanity installations.
Tub and Shower Rough-In Dimensions
Tub and shower rough-in dimensions vary more widely than toilet or sink dimensions because fixture sizes and configurations differ so much. That said, standard alcove bathtubs follow common patterns:
The tub drain is typically located 14 to 15 inches from the head wall (the wall at the faucet end) and centered side-to-side in the alcove. The tub’s overflow connection is approximately 16 to 18 inches above the drain. Check your tub manufacturer’s installation instructions for exact placement before cutting the subfloor.
For shower drains, the drain center is typically positioned at the geometric center of the shower floor for square and rectangular enclosures. For linear drains, placement varies — confirm with the drain manufacturer.
Faucet rough-in heights for tub/shower combos typically place the valve body 28 inches above the tub deck, with the shower arm 72 to 78 inches above the finished floor. Again, always verify against your specific valve’s installation specs.
Minimum Clearance Requirements Between Fixtures
Clearance requirements ensure bathroom fixtures are accessible and usable. Both the IPC and UPC set minimums, and your local code may require more. Here are the standard minimums:
- Toilet: 15 inches from centerline to any side wall or obstruction; 21 inches clear in front of bowl
- Sink: 15 inches from centerline to any side wall or obstruction; 21 inches clear in front
- Bathtub: No centerline requirement, but 21 inches of clear floor space beside the tub entry is recommended
- Between fixtures: 15 inches minimum between the centerlines of adjacent fixtures
These are code minimums. For comfortable daily use, aim for 18 to 24 inches of clearance wherever possible, particularly between the toilet and nearby walls or vanities.
How to Rough-In Bathroom Drain and Waste Lines
Rough-in drain work is the most technically demanding phase of plumbing a bathroom. It involves cutting into the floor structure, selecting the correct fittings, maintaining proper slope, and ensuring every connection meets code. Work methodically, dry-fit all assemblies before gluing, and double-check every measurement before making a permanent connection.
How to Plumb the Toilet Drain (Closet Flange, Closet Bend, Sanitary Tee)
Start at the toilet location. Using your rough-in measurement (typically 12 inches from the finished wall), mark the center of the closet flange on the subfloor. Use a 4.5-inch hole saw to cut the drain opening through the subfloor.
Below the subfloor, connect a 4-inch closet flange to a 4×3-inch closet bend. The closet bend reduces from 4 inches at the inlet (where it connects to the flange) to 3 inches at the outlet. This outlet then connects via a short section of 3-inch PVC into a 3-inch sanitary tee.
The sanitary tee serves a dual purpose: its horizontal inlet receives the toilet drain, and its vertical hub receives the toilet’s individual vent pipe above. Below the tee, the drain continues downstream toward the main stack. Any vertical-to-horizontal transition along this route must be made with long-pattern fittings (see the section on transitions below).
Once the toilet flange is set, it should sit flush with or slightly above the finished floor surface — never below it. Use a closet flange extension ring if your finish flooring raises the floor level after rough-in.
How to Plumb the Bathroom Sink Drain (P-Trap, Trap Adapter, Wall vs. Floor Outlet)
The bathroom sink drain begins at the sanitary tee roughed into the wall at approximately 18 inches above the finished floor. A 1.5-inch trap adapter glues into the hub of the sanitary tee, creating a slip-joint connection point for the P-trap arm.
A 1.5-inch P-trap connects the tailpiece (the vertical pipe from the sink drain) to the trap arm (the horizontal pipe entering the wall). The P-trap maintains a water seal that prevents sewer gas from entering the home through the drain opening. Never substitute an S-trap; they are not code-compliant because they can siphon dry under certain flow conditions.
If your wall outlet is not directly in line with the sink drain, a flexible extension tube can bridge the offset. If your drain outlet exits through the floor rather than the wall (common in older homes), an S-trap configuration may exist to replace it with a P-trap and reroute the drain through the wall if possible to bring the installation up to current code.
For double-sink vanities sharing a single drain outlet, use two slip-joint waste arms and a center outlet tee to merge both sink drains before entering the wall.
How to Plumb the Tub and Shower Drain
Tub and shower drains are often the most overlooked fixture in bathroom plumbing guides, but getting them right is critical; errors here are buried under tile and cement board and extremely difficult to fix after the fact.
For a standard alcove bathtub, the drain assembly consists of the tub drain body (which threads into the tub shoe at the bottom of the tub), an overflow plate connected to an internal trip lever or stopper mechanism, and a P-trap below the subfloor. The tub shoe, overflow tube, and P-trap are typically sold together as a tub drain assembly kit.
Position the P-trap below the subfloor so the drain outlet aligns with the drain hole cut in the tub’s floor. The trap arm exits the P-trap horizontally and connects into the drain line running toward the main stack. Maintain a minimum slope of 1/4 inch per foot on this horizontal run.
For shower drains, the drain body is set into the shower pan or mortar bed during installation. A PVC drain flange is glued to the drain body’s outlet below the floor, connecting to a P-trap and then to the main drain line. Make sure the drain flange is level and set at the correct height for your shower floor system before pouring any mortar.
Vertical-to-Horizontal Transitions Why Long-Pattern Fittings Are Required

Critical Rule: Whenever a drain line transitions from vertical flow to horizontal flow, you must use a long-pattern DWV fitting. Short-sweep elbows and standard 90s are not permitted for this transition under either the IPC or UPC.
This rule exists because waste flowing vertically has significant momentum. A short, abrupt turn creates turbulence, slows waste flow, and can cause solids to accumulate at the bend, leading to clogs and backup. Long-pattern fittings create a gradual curve that maintains flow velocity through the transition.
The three fitting options that meet this requirement are:
- Combination wye and 1/8 bend (combo fitting): The most common choice. A wye joined to a 45-degree street elbow creates a smooth, sweeping curve from vertical to horizontal.
- Wye with separate 45: A standard wye fitting connected to a separate 45-degree elbow achieves the same long-sweep geometry.
- Long-turn 90 (long-radius 90): A single fitting designed specifically for this application. Less common but fully code-compliant.
Standard short-sweep 90s and sanitary tees should never be used in the horizontal position for drain flow they are only acceptable in the vertical position (for vent connections).
How to Add a Cleanout (and Why You Shouldn’t Skip It)
A cleanout is an access point in the drain system that allows you or a plumber to rod the drain with a snake or or perform a drain and sewer camera inspection, without removing any fixtures.. Every bathroom drain system should have at least one accessible cleanout.
Installing a cleanout requires just two fittings: a cleanout adapter and a cleanout plug. The cleanout adapter is glued into the inlet of a combo fitting or wye at a logical access point in the drain run. The threaded cleanout plug screws into the adapter, sealing the opening during normal use.
Position your cleanout in an accessible location typically just upstream of where your bathroom drain ties into the main building drain. Avoid placing cleanouts behind walls or under floors where they cannot be reached. If a cleanout ends up in a finished floor, use a code-approved flush cleanout cover that sits flush with the floor surface.
How to Rough-In Bathroom Supply Lines
Supply line rough-in is generally faster and more forgiving than drain work, but it still requires careful planning. Unlike drain lines, supply lines operate under constant pressure — any leak, even a slow one, will continue until repaired. Take time to plan your runs, support pipes properly, and test thoroughly before closing walls.
Running Hot and Cold Lines to the Sink and Tub
Five supply lines are needed for a standard three-fixture bathroom: hot and cold to the sink, hot and cold to the tub or shower, and cold only to the toilet.
Start by locating your home’s main hot and cold supply lines typically in a basement, crawl space, or utility area. From there, run your new supply lines up through floor plates or along wall cavities to reach the bathroom. Use 1/2-inch supply lines for individual fixture connections in a standard bathroom. If you’re running a long distance to reach the bathroom from the main lines, consider upsizing to 3/4 inch for the main run and reducing to 1/2 inch at each branch.
When using PEX, secure the pipe with pipe straps or PEX clips every 32 inches horizontally and every 4 to 6 feet vertically to prevent sagging and movement. Leave enough slack at each stub-out location to account for final fixture connections.
Stub out the hot and cold lines at the sink location at 21 inches above the finished floor, spaced 8 inches apart. At the tub or shower, rough-in heights vary by valve type and follow the valve manufacturer’s installation guide for exact placement.
Running the Cold Supply Line to the Toilet
The toilet requires only a single cold water supply line. Stub this line out at approximately 8.25 inches above the finished floor, positioned 6 inches to the left of the toilet’s centerline (when facing the wall). This places the stub-out behind and to the left of the toilet tank, where the toilet’s supply valve will connect.
Use a 1/2-inch supply line from the branch point to the stub-out location. Install a shut-off valve at the stub-out a 1/4-turn angle stop valve is the most reliable and easiest to use. Make sure the shut-off valve is accessible once the toilet is installed.
How to Shut Off Water and Connect to the Main Lines Safely
Before making any connections to existing supply lines, shut off the water to the entire house. The main shut-off valve is typically located near where the water service enters the home — check the basement, garage, crawl space, or an exterior wall near the water meter. If you’re on well water, shut off at the pressure tank.
After shutting off the main, open a faucet at the lowest point in the house (usually a hose bib or basement faucet) to drain pressure from the lines. This prevents residual water from flooding your work area when you cut into existing pipes.
When tying new PEX lines into existing copper supply lines, use a push-to-connect fitting (such as a SharkBite) for a quick, reliable connection that doesn’t require soldering. These fittings are code-approved for most residential applications and are particularly useful in tight spaces. If you prefer a more permanent connection, use a copper-to-PEX transition fitting and crimp it with your PEX tool.
Bathroom Plumbing Vents What They Are and How to Install Them

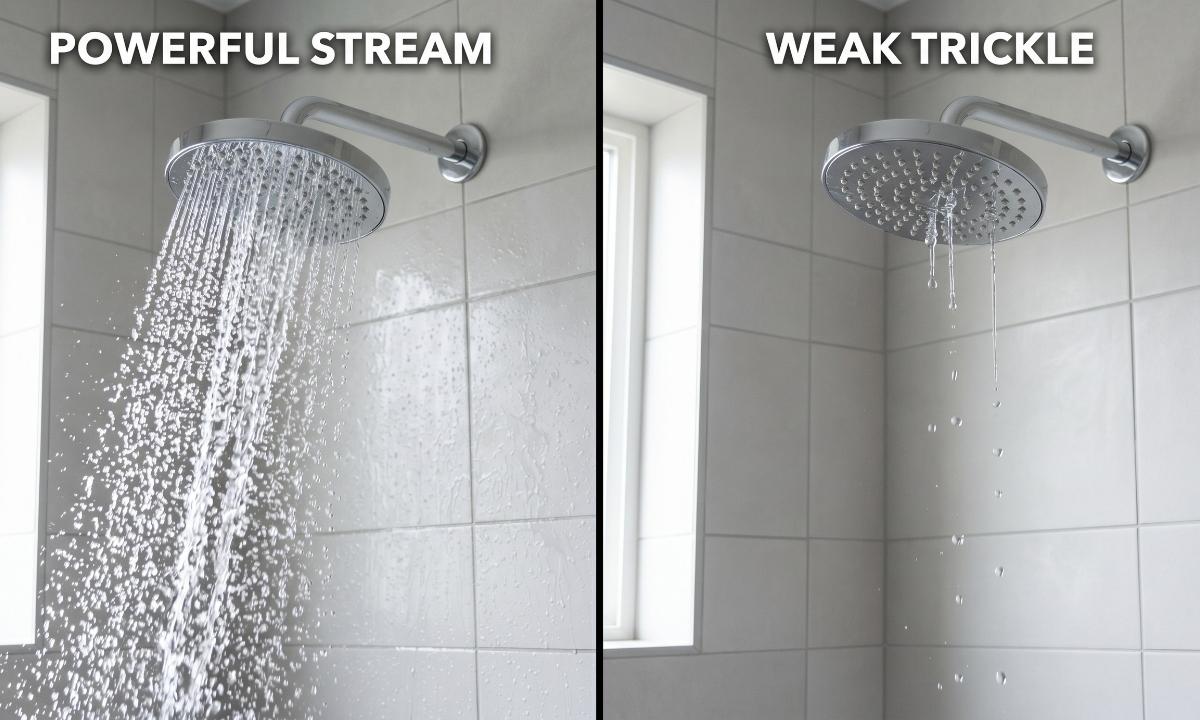
Venting is the most misunderstood part of bathroom plumbing and the most commonly skipped by inexperienced DIYers. Every drain fixture in your bathroom must be vented, without exception. A bathroom with unvented drains will gurgle, drain slowly, and eventually allow sewer gas to enter the home through trap seals that have been siphoned dry.
Why Every Fixture Needs a Vent (and What Happens if It Doesn’t Have One)
When water drains through a pipe, it creates a pressure differential and a partial vacuum forms behind the flow. Without a vent providing air to equalize that pressure, the negative pressure sucks water out of the P-trap in nearby fixtures. Once the trap seal is gone, the only barrier between your home’s interior and the sewer system is an open pipe.
The consequences range from unpleasant to dangerous: gurgling drains, slow drainage, foul odors, and in serious cases, toxic sewer gas (including hydrogen sulfide and methane) entering the living space. Proper venting prevents all of these problems by keeping the drain system at atmospheric pressure throughout.
How to Size Individual Vents (IPC vs. UPC Requirements)
For individual (conventional) venting where each fixture has its own dedicated vent the sizing requirements differ between codes:
- Toilet vent: 1.5 inches minimum under the IPC; 2 inches minimum under the UPC
- Bathroom sink vent: 1.25 inches minimum under both codes (though 1.5 inches is more common in practice)
- Bathtub/shower vent: 1.5 inches minimum under both codes
To connect the toilet’s vent to the 3-inch sanitary tee hub, you’ll need a flush bushing: a 3×1.5-inch bushing under the IPC, or a 3×2-inch bushing under the UPC. Flush bushings sit flat inside the hub of the sanitary tee, reducing the opening to the appropriate vent size.
Individual vents typically connect together as they rise toward the roof. The sink’s individual vent, for example, commonly tees into the toilet’s vent using an upside-down sanitary tee before both continue to the roof penetration together. This saves material and minimizes roof penetrations.
Do Horizontal Vents Need to Be Sloped?
Yes with a caveat depending on your code. Both condensation from humid air inside vent pipes and rainwater that enters at the roof can accumulate in horizontal vent sections. Without slope, this water pools inside the vent and can eventually block it.
The IPC requires horizontal vent pipes to be sloped back toward the drainage system typically 1/4 inch per foot so any accumulated moisture drains away rather than pooling. The UPC is more lenient: it allows horizontal vents to be level (without slope) as long as they don’t have sags or any drops that would trap water. However, the UPC still prohibits horizontal vents that dip below the fixture’s flood level rim.
Regardless of which code applies, good practice is to slope all horizontal vent sections slightly. This costs nothing extra and eliminates the risk of moisture accumulation regardless of which standard is enforced in your area.
Cold Climate Venting How to Prevent Frost Closure
In cold climates, the warm, moist air rising through vent pipes can freeze as it meets cold outside temperatures near the roof penetration. Ice builds up gradually on the inside of the vent pipe until it closes off entirely effectively blocking all venting for every fixture connected to that stack.
Both the IPC (Section 903.2) and UPC (Section 906.7) address this by requiring vent pipes to be increased in diameter before they exit the roof in cold-weather locations. The standard upsize is to 3-inch pipe, though your local code may specify differently. Critically, this increase must occur within the building’s thermal envelope inside the heated portion of the home so the wider section of pipe is already at a location where freezing is less likely to occur.
If you’re plumbing a bathroom in a region that experiences extended freezing temperatures, consult your local code for the specific frost-closure requirements before finalizing your vent design.
Installing Bathroom Fixtures (Finishing the Job)
Once all rough-in plumbing has been inspected and approved, walls and floors can be closed, finished surfaces installed, and fixtures set. This phase is the most visible part of the project — and the most satisfying. Work carefully, as fixture installation errors are easier to see and harder to explain than rough-in mistakes.
How to Install a Toilet (Flange, Seal, Supply Connection)
Before setting the toilet, confirm the closet flange is at the correct height flush with or slightly above the finished floor. If the flange is too low, use a flange extension to raise it to the right level.
Press a new wax ring onto the horn (underside outlet) of the toilet bowl. Wax rings come in standard and extra-thick versions use the extra-thick version if there’s more than 1/4 inch of gap between the flange and the underside of the toilet base. Lower the toilet carefully onto the flange bolts, pressing down firmly to compress the wax ring. Avoid rocking the toilet, which can break the wax seal.
Hand-tighten the nuts onto the flange bolts, then snug them with a wrench alternating sides to maintain even pressure. Do not overtighten; this can crack the porcelain base. Trim the flange bolts flush with the cap covers. Connect the toilet’s fill valve to the cold water stub-out using a braided stainless supply line and hand-tighten the coupling nut.
How to Install a Bathroom Sink (Pop-Up Drain, P-Trap Assembly, Double Sink Configurations)
Begin by installing the pop-up drain assembly into the sink bowl. Apply a rope of plumber’s putty around the drain flange before pressing it into the drain hole from above. From below, thread on the drain body, tighten the locknut to compress the putty, and connect the pivot rod linkage to the stopper.
With the vanity in place and the sink set, connect the drain assembly under the sink. Attach the tailpiece to the drain body, then connect the P-trap J-bend to the tailpiece using a slip-joint nut and washer. Extend the trap arm into the wall outlet using the appropriate wall tube, securing with slip-joint fittings. Ensure the trap arm slopes slightly downward toward the wall (about 1/4 inch per foot) never upward.
For double-sink vanities, connect both tailpieces to a center outlet tee using slip-joint waste arms, then run a single trap arm from the tee outlet into the wall. Test both drains individually before sealing the vanity to the wall.
How to Install a Bathtub or Shower Drain Assembly
For a standard alcove bathtub, set the tub in position and dry-fit the drain assembly before making any permanent connections. The drain assembly consists of the drain strainer, the tub shoe (the threaded fitting that the strainer screws into), the overflow pipe, and the trip lever plate.
Apply plumber’s putty under the drain strainer flange and press it into the drain hole. From below, connect the tub shoe with a rubber gasket between the shoe and the tub floor, then tighten the crossbar inside the strainer to compress the gasket. Slide the overflow pipe up through the tub overflow opening and secure the trip lever plate with screws. Connect the drain assembly to the P-trap below the subfloor with a slip-joint or glued connection.
For shower pans and tile showers, the drain body is typically set during the shower pan installation (before tile work begins). Once tile is complete, the drain strainer covers screws or snaps into the drain body. Test the drain with a full bucket of water before grouting to confirm a watertight seal.
How to Test for Leaks and What to Do If You Find One
Never close walls or finish floors until you’ve tested every connection under real-use conditions. For drain lines, plug all fixture openings and fill the system with water, then observe every joint for seeps over a 15-minute period. For supply lines, restore water pressure and check every connection including stub-outs, valve bodies, and any push-to-connect or crimped fittings.
If you find a leak at a glued PVC joint, the connection must be cut out and rebuilt; solvent cement bonds are permanent and cannot be re-glued. For slip-joint connections (under the sink), tighten the slip-joint nut slightly. If the leak persists, remove the fitting, reseat the washer with the beveled side correctly oriented, and reconnect. Never overtighten plastic slip-joint fittings hand-tight plus a quarter turn is usually sufficient.
For PEX crimped connections, if a crimp ring leaks, cut the fitting off and install a new one. If a push-to-connect fitting leaks, disconnect, inspect the pipe end for burrs or scratches, clean it up, and reconnect.
Common Bathroom Plumbing Mistakes (and How to Avoid Them)
This section addresses the errors that don’t appear in most plumbing guides but show up in failed inspections, costly callbacks, and miserable middle-of-the-night emergency plumbing calls. Learning from these mistakes before making them is worth more than any single step in this guide.
Wrong Pipe Slope on Drain Lines
Drain lines rely on gravity, not pressure, to move waste. If a horizontal drain run is too flat, solids settle out of the flow and accumulate leading to recurrent clogs that require professional drain and sewer cleaning. If it’s too steep, liquid races ahead of solids, leaving them stranded in the pipe (a condition called self-scouring failure).
The correct slope for drain lines is 1/4 inch of fall per foot of horizontal run. The IPC and UPC both specify this as the standard, with 1/8 inch per foot as the absolute minimum for larger pipes (3 inches and above). Use a level with a slope measurement function, or mark your pipe supports carefully with a tape measure, to maintain consistent grade across the entire run. Even a single low point (a sag) in an otherwise properly sloped run creates a pocket where water and waste accumulate.
Using the Wrong Fittings for Vertical-to-Horizontal Transitions
This is one of the most frequently cited code violations in residential plumbing inspections. Using a standard 90-degree elbow or a short-sweep fitting where a drain line changes direction from vertical to horizontal is not code-compliant under either the IPC or UPC and for good reason. These fittings create a sharp corner that disrupts flow and causes waste to impact the pipe wall, slowing velocity and creating buildup.
Always use a combo fitting (combination wye and 1/8 bend), a wye with a separate 45-degree elbow, or a long-turn 90 for any location where drain flow transitions from vertical to horizontal. Save your standard 90s for vent lines, where flow direction is air rather than waste.
Skipping or Incorrectly Sizing Vents
Unvented or undersized vents are the most common cause of gurgling drains and persistent sewer gas odors in otherwise correctly installed bathrooms. Because vents are hidden inside walls and above ceilings, this mistake is also one of the hardest to diagnose and fix after the fact.
Every fixture must have a vent. The vent must be the correct size for your code (remember: toilet vents are 1.5 inches under IPC but 2 inches under UPC). Vents must extend above the fixture’s flood level rim before going horizontal, and horizontal vent sections must not dip or sag. Failing any one of these requirements can compromise the entire vent system’s effectiveness.
If you’re adding a bathroom to an existing home, make sure the new vent load doesn’t exceed the capacity of the existing vent stack. Consult a plumber if you’re unsure.
S-Traps, Improper Cleanout Placement, and Other Code Violations
S-traps where the trap arm exits downward into a floor outlet rather than horizontally into a wall were common in homes built before the 1970s but are no longer code-compliant. An S-trap can siphon itself dry during normal drain flow, eliminating the water seal that keeps sewer gas out. If you encounter an S-trap during a renovation, replace it with a P-trap and reroute the drain through the wall.
Cleanout placement violations are also common. Cleanouts must be accessible without removing permanent construction placing one inside a sealed wall cavity or under a tiled floor without a flush access cover is a code violation. Plan cleanout locations before closing walls, and install access panels or flush cleanout covers wherever the cleanout isn’t in open floor space.
Other frequently cited code violations include: using the wrong pipe material for a given application, failing to support pipes at code-required intervals, running vents too close to windows or air intakes on the exterior, and failing to slope horizontal drain lines correctly. When in doubt, have a licensed plumber review your rough-in before calling for inspection.
Frequently Asked Questions
How Long Does It Take to Plumb a Bathroom?
The timeline depends heavily on experience level, project scope, and whether you’re working on new construction or a remodel. For a licensed plumber, rough-in plumbing for a new three-fixture bathroom typically takes one to two days. For an experienced DIYer working carefully, expect the same rough-in to take two to four days, plus additional time for fixture installation.
Remodeling situations take longer due to demolition, working around existing structures, and the complexity of tying into existing plumbing. Factor in extra time for permit applications (which can take days to weeks depending on your jurisdiction) and inspection scheduling.
Can I Plumb a Bathroom Without a Permit?
Technically, you can but you shouldn’t, and in most jurisdictions, you legally cannot. Unpermitted plumbing work creates real problems: it may not be covered by your homeowner’s insurance if it causes damage, it can trigger issues during a home sale when the work shows up (or doesn’t show up) in disclosure documents, and if it fails and causes damage to your home or a neighbor’s, liability falls entirely on you.
In most areas, plumbing that connects to the main drain or main water supply lines requires a permit. The permit process forces an inspection that protects you; it’s a second set of experienced eyes on your work before walls are closed. Pull the permit.
What Is the Correct Slope for Bathroom Drain Pipes?
The standard slope for residential drain pipes is 1/4 inch of vertical drop per foot of horizontal run. This applies to all drain lines 2.5 inches in diameter and smaller. For 3-inch and larger pipes, both the IPC and UPC permit a minimum slope of 1/8 inch per foot, though 1/4 inch is still preferred.
Avoid exceeding 1/2 inch per foot on drain lines steeper than this, liquids move so quickly that solids are left behind in the pipe. Consistency matters as much as the specific number; an entire drain run should maintain the same slope throughout, without flat spots or reverse grades.
What Size Pipe Do I Need for a Bathroom Drain?
Pipe sizing in a bathroom follows these general rules under both the IPC and UPC:
- Toilet drain: 3-inch minimum (the closet bend and all pipe downstream of the toilet must be at least 3 inches)
- Bathroom sink drain: 1.5-inch minimum (1.25 inches is code minimum but 1.5 is standard practice)
- Bathtub/shower drain: 1.5-inch minimum
- Combined bathroom drain (all fixtures sharing one line): 3-inch minimum when a toilet is included
Supply lines are typically 1/2 inch for individual fixture connections, with 3/4-inch main runs recommended when the bathroom is located far from the main supply lines.
Do I Need a Separate Vent for Every Bathroom Fixture?
Individual (conventional) venting gives each fixture its own vent, which is the simplest approach and what this guide covers. However, plumbing codes permit several alternative venting methods that can reduce the number of separate vent pipes needed.
Wet venting allows a single pipe to serve as both a drain for one fixture and a vent for another commonly used to connect a sink drain into the toilet’s drain/vent line. Common venting allows two fixtures side-by-side to share a single vent. These methods require careful sizing and placement to meet code, but they can significantly simplify the venting system in a tight space.
In practice, most straightforward bathroom installations use individual venting because it’s the easiest to understand, plan, and inspect. If you’re tight on wall space for multiple vent runs, consult a licensed plumber about wet venting options for your specific layout.
Conclusion
Plumbing a bathroom is a demanding but highly learnable project. When approached systematically starting with proper planning, following code requirements, using the right materials and fittings, and testing every connection before closing walls it’s a project that can save thousands of dollars in labor costs and deliver lasting, reliable results.
The key principles to carry with you from this guide: always check your local code (IPC or UPC) before buying materials; maintain correct drain slope throughout every horizontal run; never skip venting; use long-pattern fittings for every vertical-to-horizontal drain transition; install cleanouts where they can actually be accessed; and pull a permit so your work gets inspected before walls are sealed.
Whether you’re building a new bathroom from scratch, adding a half bath to an unfinished basement, or replumbing an aging system, the steps covered in this guide give you the foundation to do it right.
If any part of the project feels beyond your current skill level particularly the rough-in work or any connections to the main stack, hiring a licensed plumber for those specific phases is a smart investment. Many homeowners successfully handle fixture installation themselves while leaving rough-in work to a professional. There’s no rule that says it has to be all-or-nothing.
Ready to start your project? Share this guide with your plumber or building inspector to confirm your plan meets local requirements before breaking ground.