Plumbing Made Easy: Removing Your Shower Drain Like a Pro
If your shower drain is draining slowly, or if you see rust or other damage, it might be time to remove and replace it. You may wonder if you can handle this task yourself or if it’s better to call a professional plumber.
Fortunately, removing a shower drain is a quick and straightforward job that even beginners can do with the right tools and instructions. In this blog, we’ll walk you through how to remove a shower drain step-by-step, making it easy and stress-free. Let’s get started!
How To Remove A Shower Drain: Why It’s Important
Regularly cleaning your shower drain is essential for keeping your bathroom clean and odor-free, as well as for avoiding serious plumbing problems in the future.
Clogged drains can cause water backups, pipe damage, and even mold growth, leading to expensive repairs and health risks. By using simple and natural cleaning methods, you can keep your shower drain in top condition and enjoy a fresh, hygienic bathing experience. But sometimes, you have to completely remove your shower drains in order to clean and clear them. But, how do you remove a shower drain?
How To Remove a Shower Drain
Step 1: Remove Any Clogs First, run the shower for a few minutes to see if it drains slowly. If it does, unclog the drain before removal. Use a drain snake to pull out hair, grease, or residue. If you don’t have a drain snake, pour hot water mixed with baking soda and vinegar down the drain.
Step 2: Lubricate the Drain Apply a silicone-based lubricant or WD-40 to the visible parts of the drain and pour some down to cover hidden areas. Let it sit for about 10 minutes to make removal easier. Avoid using cooking oil as it can cause blockages.
Step 3: Remove Any Screws Check for screws holding the drain in place and remove them with a flathead screwdriver. Keep the screws in a secure container to avoid losing them.
Step 4: Loosen the Drain Insert two pairs of needle-nose pliers into opposite openings of the drain. Turn the drain counterclockwise to loosen it. If it resists, apply more lubricant and wait 10 minutes before trying again.
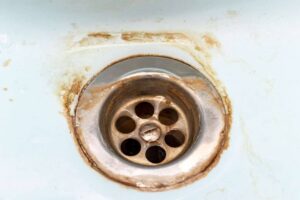
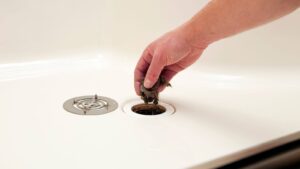
Step 5: Remove the Shower Drain Grip the drain with the pliers and pull it upwards carefully. If it’s stubborn, add more lubricant and check for clogs. Once removed, clean the drain thoroughly, removing any rust. Consider replacing it if it’s severely corroded or damaged.
By following these steps, you can easily remove your shower drain for cleaning or replacement.
When To Call a Professional
If you’re dealing with a pesky clog below the shower drain cover, several DIY and over-the-counter fixes can provide temporary relief. Inexpensive drain clog remover tools for hair, baking soda and vinegar, and even using a plunger can help remove the clog. However, these are quick fixes. To prevent the buildup from recurring or moving deeper into the drain pipe, follow up by learning how to remove a shower drain properly.
For a long-term solution, call Local Service Pro Plumbing. Our experts can ensure your drains are thoroughly cleaned and functioning perfectly. Contact us today for professional assistance and peace of mind.


